
In the world of plant-based and macrobiotic cuisine, Chickpea Curry (a modern take on Chana Masala) always holds a prime spot thanks to its high protein content and soul-warming flavors. However, a world-class curry is defined not just by its heat, but by its texture.
Many home cooks rely on flour or corn starch to thicken their sauce, but this can inadvertently dull the purity of the flavors and “gray out” the vibrant colors of the dish. Today, we will master the Coconut Chickpea Curry using a professional technique: thickening through the natural starch of the chick peas and the depth of caramelized onions.
1. Curated Ingredients (Serves 4)
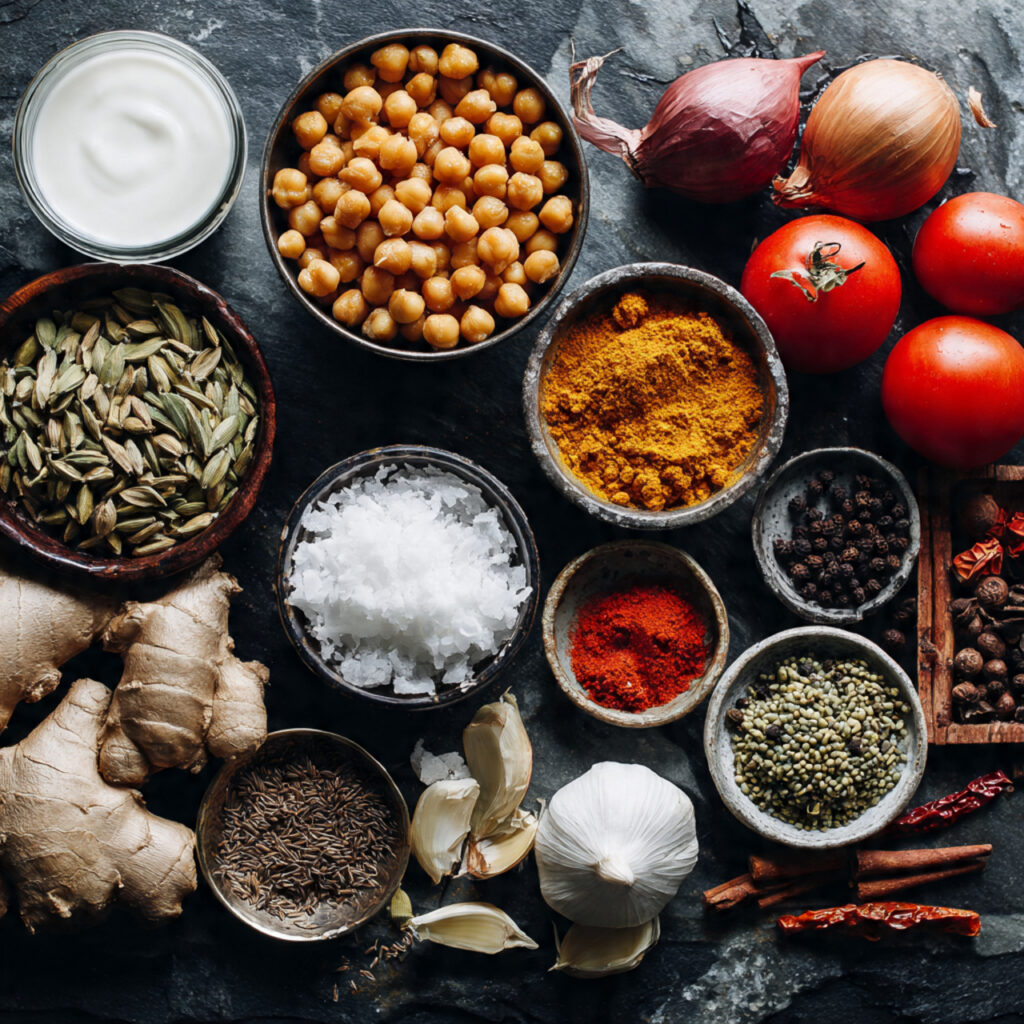
The success of this dish lies in the quality of the spices. If possible, prioritize whole spices and grind them fresh.
-
The Star: 500g chick peas (soaked and boiled until tender) or 2 cans of premium quality chick peas.
-
The Cream: 400ml high fat Coconut Cream (first press preferred).
-
The Base: 2 large onions (finely diced), 3 ripe tomatoes (pureed or finely chopped), 2 tbsp coconut oil or Ghee.
-
Aromatics: 2 tbsp minced ginger, 2 tbsp minced garlic, 2 green chilies (slit).
-
Dry Spices:
-
1 tbsp Madras Curry Powder (or your preferred yellow curry blend).
-
1 tsp Turmeric powder (for vibrant color).
-
1 tsp Cumin powder & 1 tsp Coriander powder.
-
1/2 tsp Garam Masala (added at the very end).
-
-
Whole Spices: 1 cinnamon stick, 3 cloves, 2 green cardamom pods.
2. Professional Execution
Step 1: The “Melt in your mouth” Base Technique
The secret of professional chefs lies in how they handle onions. Do not just sauté them; sweat the finely diced onions over low-medium heat for 10-15 minutes with a pinch of salt. As the onions caramelize, they break down into a thick, sweet paste that provides a profound depth and body to the sauce without needing any flour.
Step 2: Blooming the Spices
Once the onions reach a golden-brown hue, add the ginger, garlic, and chilies. Push the mixture to one side of the pan, add a splash of oil to the empty space, and toast your dry spices (turmeric, coriander, cumin, curry powder). Searing them in hot oil for 30 seconds releases their essential oils, ensuring the dish doesn’t have a “raw” spice aftertaste.
Step 3: Emulsifying with Tomatoes
Add the tomato puree. Cook over medium heat until the tomatoes soften completely and the mixture begins to release oil (oil separates from the paste). This is a critical stage to ensure the sauce has a brilliant color and won’t separate when the coconut milk is added later.
Step 4: Simmering & The Thickening Secret
Incorporate the chick peas into the spice base, adding about 150ml of vegetable stock (or the chickpea cooking liquid).
Key Technique: While the curry is simmering, use a large spoon to mash about 10% of the chick peas against the side of the pot. This released starch will dissolve into the liquid, instantly creating a silky, cohesive, and thick texture.
Step 5: Finishing with Coconut Cream
Lower the heat to a minimum and pour in the coconut cream. Stir gently in one direction. Let it simmer for only 5 more minutes to allow the flavors to marry.
Note: Do not cover the pot during this stage to keep the currys color bright. Finally, sprinkle the Garam Masala to preserve its delicate, volatile aroma.
3. Common Pitfalls to Avoid (Troubleshooting)
To ensure your curry is nothing short of perfection, keep an eye out for these 5 common mistakes:
-
Coconut Milk “Splitting”: Adding coconut cream to a rolling boil or cooking it for too long will cause it to curdle and separate. Always use a gentle simmer.
-
Burnt Spices: Adding dry powders to a bone-dry, scorching pan will turn the sauce bitter. Always have your tomatoes ready to deglaze the pan immediately after blooming the spices.
-
The “Acid Barrier”: If you add undercooked chickpeas to the tomato base, the acid in the tomatoes will “lock” the bean’s skin, preventing it from ever softening. Ensure your chickpeas are fully tender before they meet the tomatoes.
-
Consistency Issues: If the sauce is too thin, you likely skipped the “mashing” step. If it’s too thick, add a splash of stock never water to maintain the flavor profile.
-
Muted Flavors: Without a final hit of acidity (Lemon/Lime), the dish can feel heavy or “cloying” due to the high fat content. A squeeze of citrus at the end “cuts” through the fat and brightens every layer of spice.
4. Serving & Storage
-
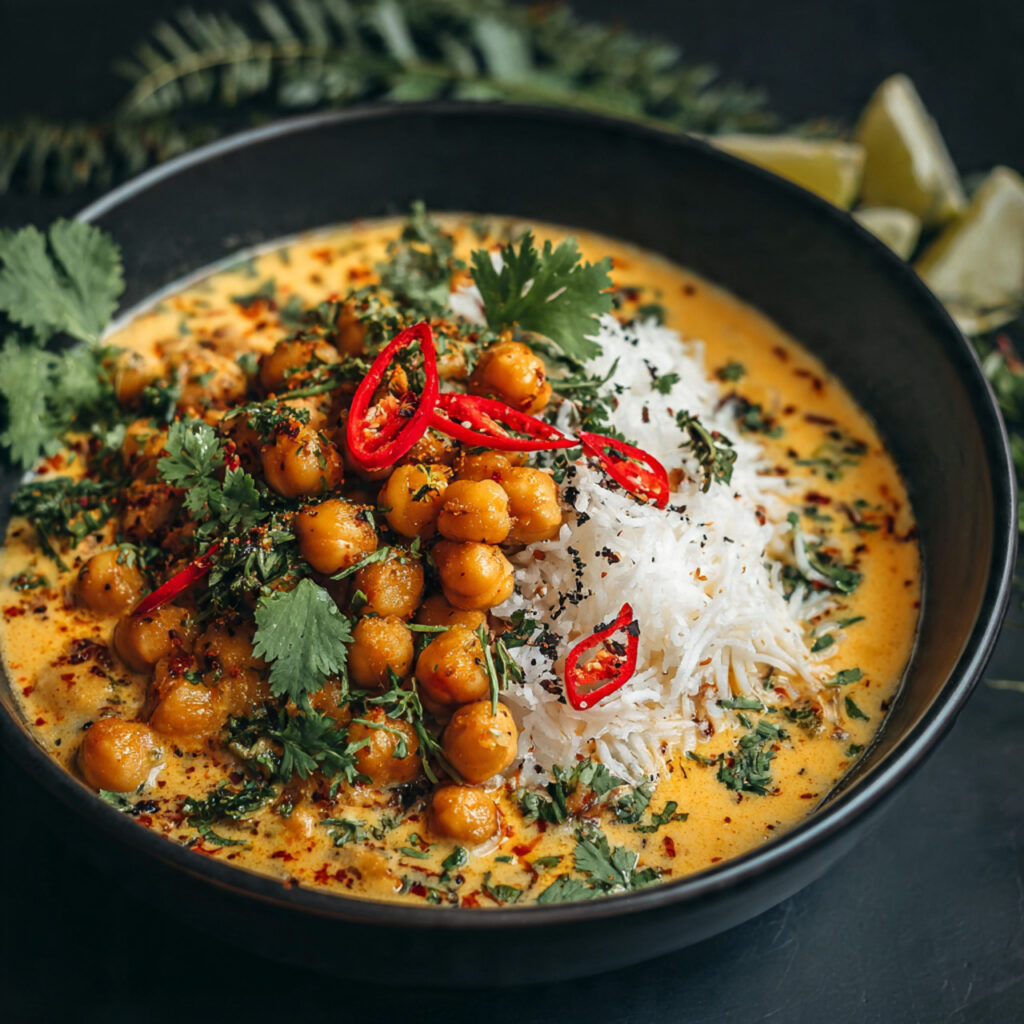
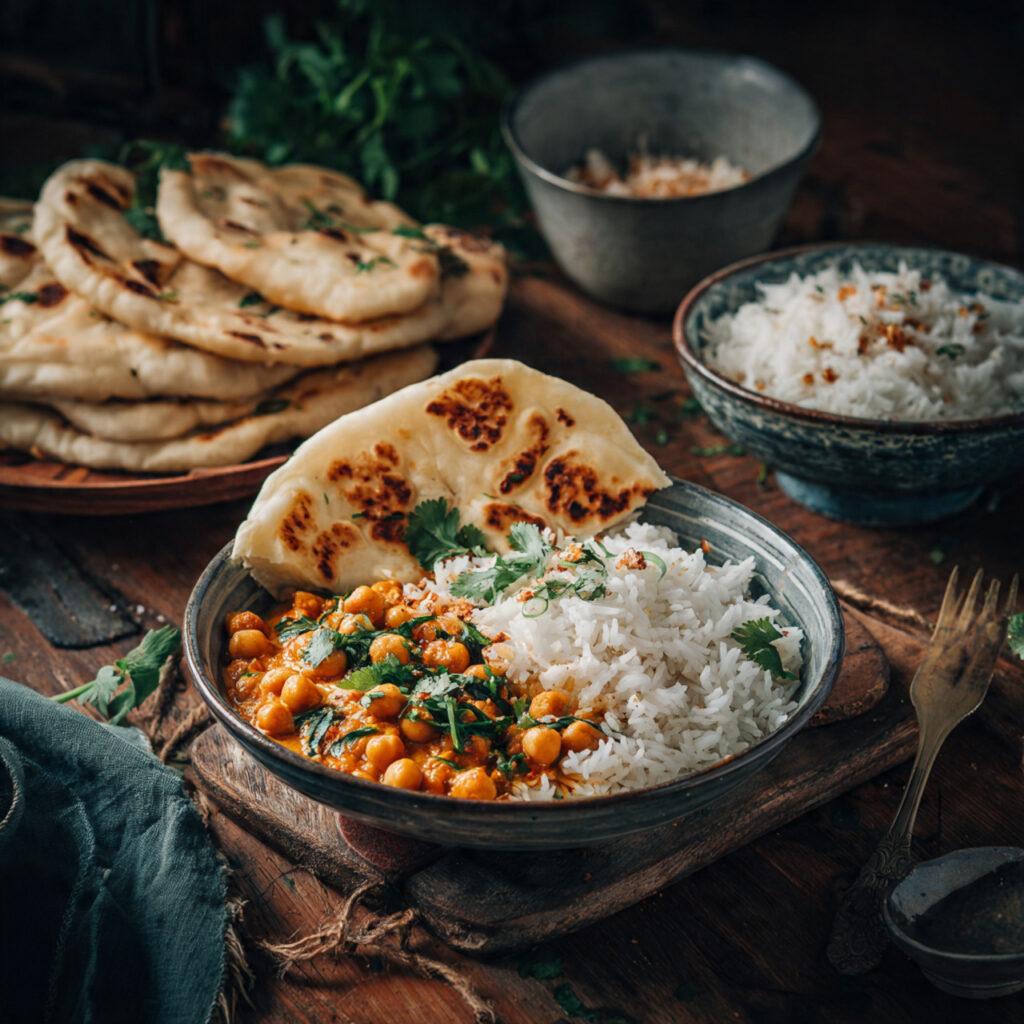
Serving: The curry should be creamy and coat the back of a spoon. Garnish with fresh cilantro and a few slices of red chili for contrast.
-
The Balance: Serve with fragrant Jasmine rice or warm Garlic Naan.
-
Storage: This curry is arguably better the next day. As it rests in the fridge, the flavor molecules have time to penetrate deep into the heart of the chick peas.
Closing Thought: Coconut Chickpea Curry is more than just a meal; it is a sophisticated symphony of flavors. By removing flour, you not only make this dish gluten-free but also allow the true, nutty essence of the “golden” chickpea to shine.
Have you tried the mashing technique to thicken your sauces before? Share your results in the comments below!